Skip to content
Sports Tracker
  • Tour
  • Pricing
  • Blog
  • Support
  • Signup
  • Contact Us
School Login
School Login
STUDENT LOGIN
STUDENT LOGIN
Sports Tracker
Sports Tracker
  • Tour
  • Pricing
  • Blog
  • Support
  • Signup
  • Contact Us
School Login
School Login
STUDENT LOGIN
STUDENT LOGIN
Sports Tracker

Getting Started

7
  • Student Import Template
  • Meet Import Template
  • Creating & Importing Students into Sports Tracker
  • Creating Teams in Sports Tracker
  • Creating Organizations in Sports Tracker
  • Creating & Assigning Admin Users to Organizations
  • Add Existing Event Records to your Sports Tracker Organization

Setting Up Meets

13
  • Reusing an existing meet
  • How to view runner up champion students
  • How Admins Add Students to an Event
  • Generating Lane Slips
  • Download Marshall & Blank Event Sheets to PDF
  • Offline Nomination Forms
  • How Students Register Themselves to Events
  • Enter all eligible students to all events
  • Champion Student Events
  • Creating Your First Meet in Sports Tracker
  • Creating Trophies
  • Creating Meet Scoring Schemes in Sports Tracker
  • Creating Events in Your Sports Tracker Meet

Results Entry

7
  • Using The Inbuilt Timer
  • Using the “Result Place Mix” Feature in Sports Tracker
  • Entering Results for Team Based Events
  • Entering Results for Attempt Based Events
  • Entering Results for Time Based Events
  • Entering High Jump or Pole Vault Results
  • Bulk Remove Participants from Events

FAQ

19
  • Viewing Student Personal Bests for Events
  • Share Progressive Results to your Community
  • Navigating the Meet Dashboard Post Event
  • Limit Participants in Events
  • Exporting PDF Results & Champions
  • Viewing Progress in the Meet Dashboard
  • Student Login Cards
  • Simple High Jump Result Entry
  • Only Score Champion Events
  • Using a RSS Reader App to follow Results
  • Troubleshooting Login Issues in Student Self-Registration
  • Student Self Registration Best Practice
  • Student Registration Parent Letter Template
  • Results Not Showing on Attempt Based Events
  • Graduate Student Year Levels
  • Awarding Bonus Points for Meets
  • Monitoring Student Progress in Self-Registration
  • Lane Allocation
  • Loop Lanes on Marshall Sheets
View Categories
  • Home
  • Knowledgebase
  • Setting Up Meets
  • How Admins Add Students to an Event

How Admins Add Students to an Event

2 min read

This tutorial aims to show you how admins will be able to add students to an event using the Sports Tracker web app.

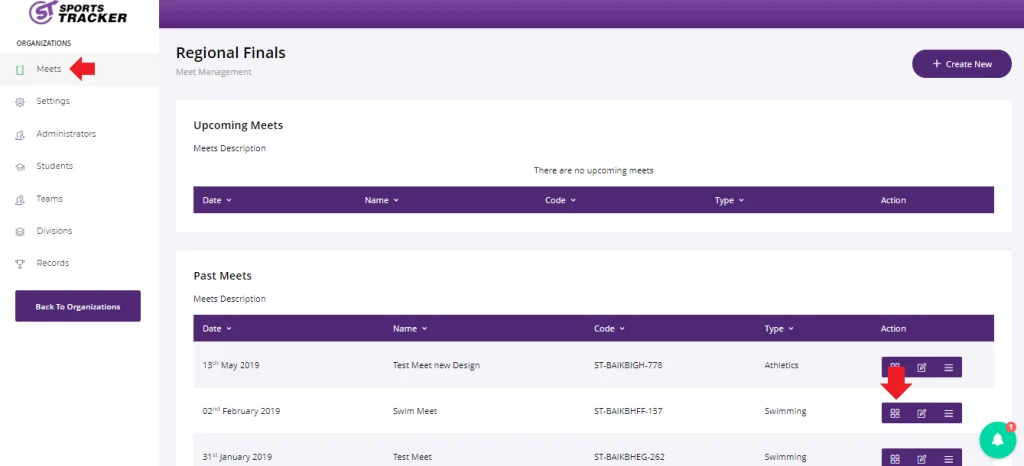
Step 1: First click on the Meets tab and click the Meet Progress icon where you want the students to be added.

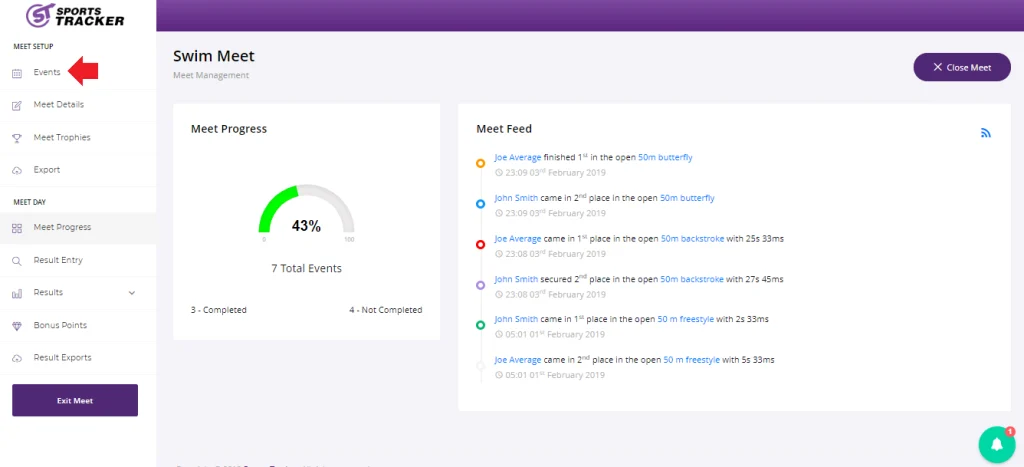
Step 2: Click on Events.

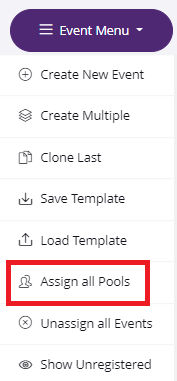
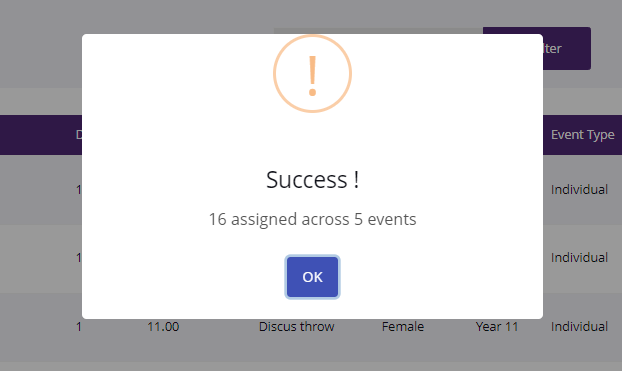
Step 3: To enroll all eligible students from event pools to all events, visit the event menu from inside of your meet as shown below. Select ‘Assign all Pools’.

Once confirmed, this will alert you with the outcome as below. If you need to select participants individually, proceed to Step 4.

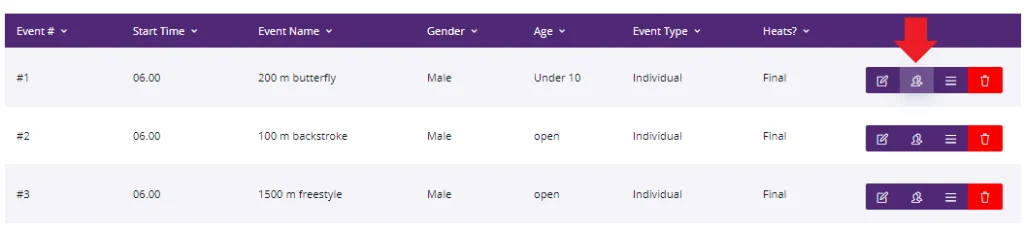
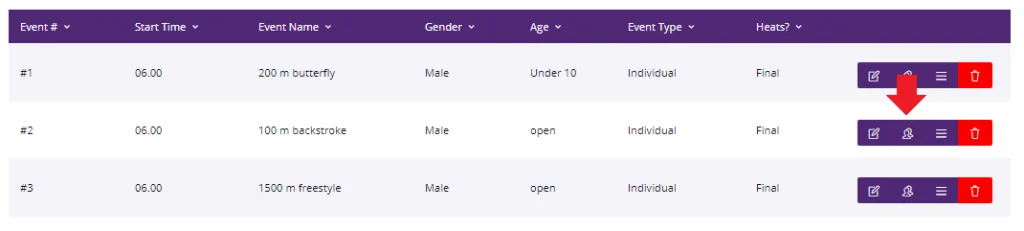
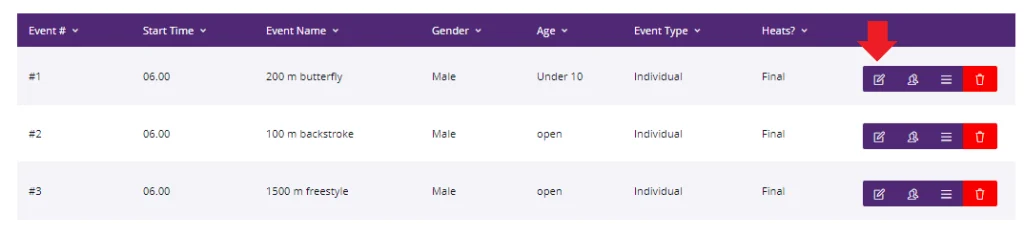
Step 4: Inside the Events, all of the events that we have set-up before will be listed here. Now click on Participant icon to open a new window.

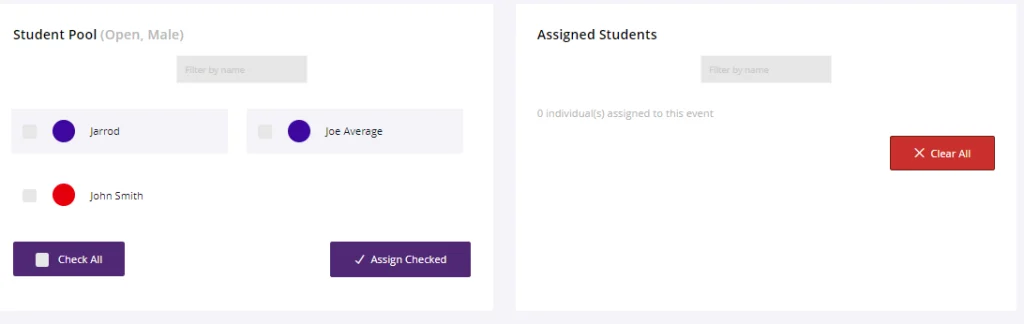
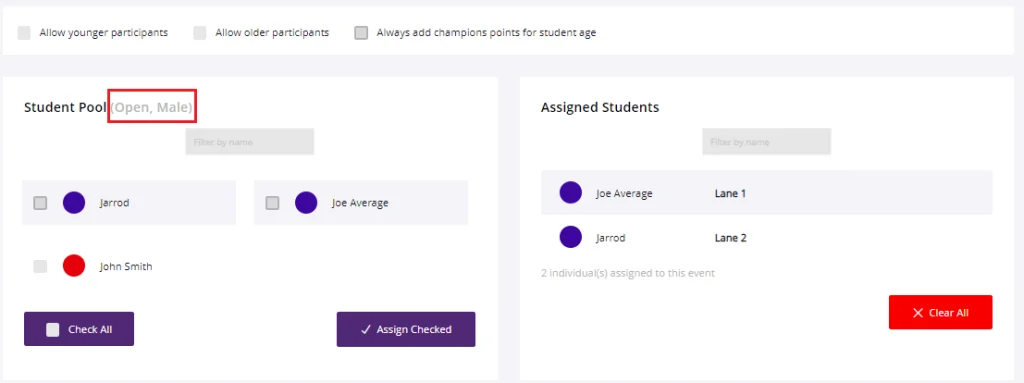
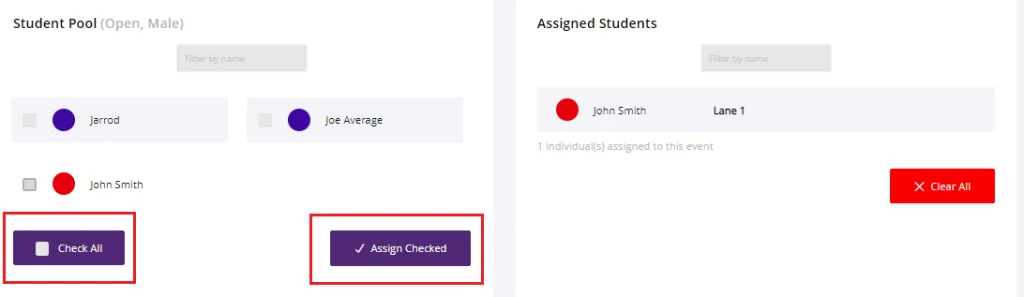
Step 5: On the new window, all participating students on this age group will be listed on the left section called the Student Pool. Tick the box beside the student’s name then click on Assign Checked.

Step 6: When you’re done adding participants, simply click Events tab and move to your next event.

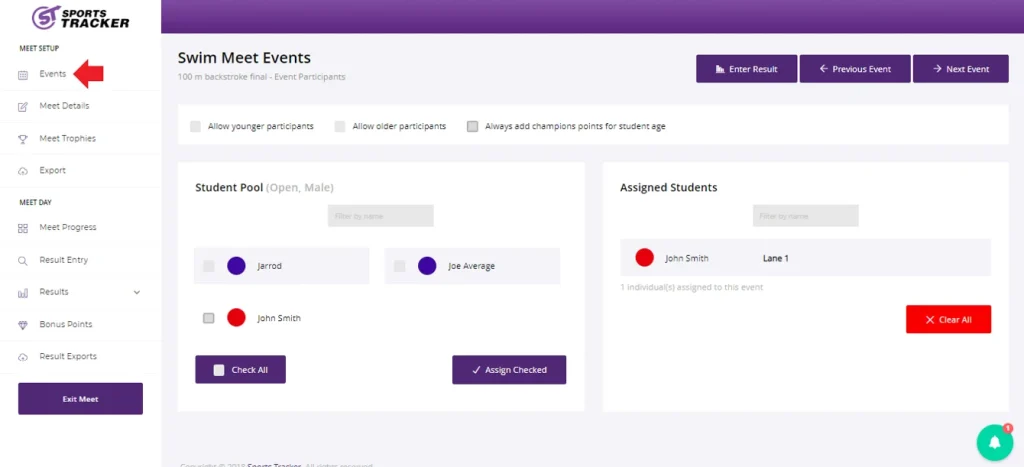
Step 7: We now move to the next event click on Participant icon.

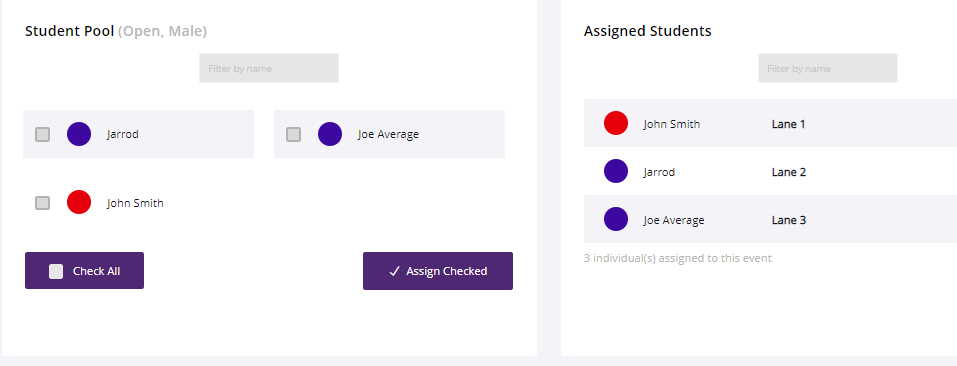
Step 8: If everyone in the age group is going to participate in this event, move to the bottom of the page and tick Check All then click Assign Checked.

Step 9: It will now populate the students assigned to this event.

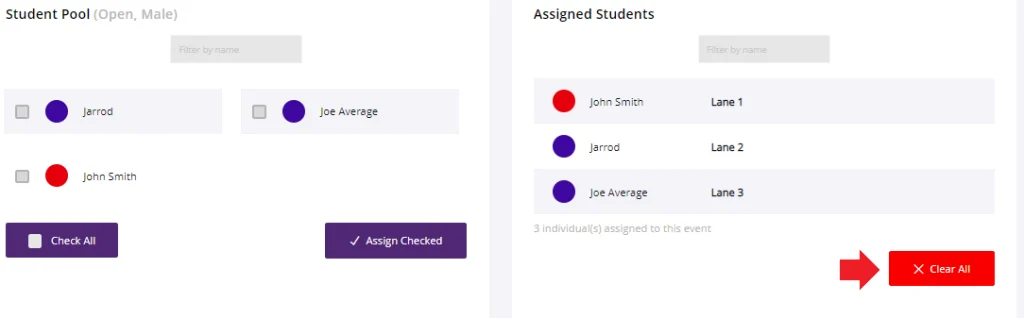
Step 10: If you want to delete all the assigned students on the list go to the bottom of the page and click on clear all.

Note: Step 10 is Optional.

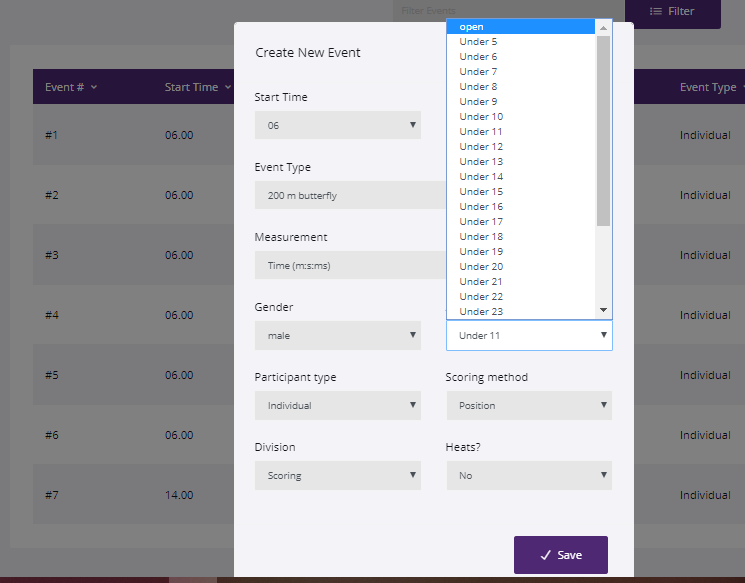
Step 11: To edit event information, click on Edit icon then click on the arrow available on all events to change event information. You can also add more participants depending on the selection. Here is an example, click the arrow beside under 10 then select open.

Step 12: You can see that the list is now filled with students from all age groups that will participate your events. This is all the steps to register students for all your events.

Updated on May 17, 2025
admin, event, event registration, student

What are your Feelings

  • Happy
  • Normal
  • Sad
Share This Article :
  • Facebook
  • X
  • LinkedIn
  • Pinterest
How to view runner up champion studentsGenerating Lane Slips
  • Tour
  • Pricing
  • Blog
  • Support
  • Signup
  • Contact Us
School Login
School Login
  • Tour
  • Pricing
  • Blog
  • Support
  • Signup
  • Contact Us

Product

  • Discover Features
  • Free Trials and Demo
  • What’s Next?

Company

  • About Us
  • Terms of Service
  • Privacy Policy
  • Data Processing Agreement
  • Data Breach Policy
  • Contact Us

Learning

  • Support Centre
  • Blog
  • FAQ

© Schoolzine Pty Ltd